FIDO2/WebAuthn - WebView Bridge
If you are using a WebView for your login flow and have already integrated FIDO2/WebAuthn support in your webservice by using the W3C WebAuthn specification, you can use our WebView-WebAuthn Bridge for passwordless login and two-factor authentication. In this guide, you’ll learn how to add the Bridge to the WebView you use for your login process.
Add the SDK to Your Project
To get a username and password for our Maven repository, please contact us for a license.
Add this to your build.gradle:
repositories {
    google()
    jcenter()
    maven {
        credentials {
            username 'xxx'
            password 'xxx'
        }
        url "https://maven.cotech.de"
    }
}

dependencies {
    // FIDO2/WebAuthn implementation
    implementation 'de.cotech:hwsecurity-fido2:4.4.0'
}
Initialize the Hardware Security SDK
To use the SDK’s functionality in your app, you need to initialize the SecurityKeyManager first.
This is the central class of the SDK, which dispatches incoming NFC and USB connections.
Perform this initialization in the onCreate method of your Application subclass.
This ensures Security Keys are reliably dispatched by your app while in the foreground.
We start by creating a new class which extends android.app.Application as follows:
class MyCustomApplication : Application() {
    override fun onCreate() {
        super.onCreate()

        val securityKeyManager = SecurityKeyManager.getInstance()
        val config = SecurityKeyManagerConfig.Builder()
            .setEnableDebugLogging(BuildConfig.DEBUG)
            .build()
        securityKeyManager.init(this, config)
    }
}
public class MyCustomApplication extends Application {
    @Override
    public void onCreate() {
        super.onCreate();

        SecurityKeyManager securityKeyManager = SecurityKeyManager.getInstance();
        SecurityKeyManagerConfig config = new SecurityKeyManagerConfig.Builder()
            .setEnableDebugLogging(BuildConfig.DEBUG)
            .build();
        securityKeyManager.init(this, config);
    }
}
Then, register your MyCustomApplication in your AndroidManifest.xml:
<application
    android:name=".MyCustomApplication"
    android:label="@string/app_name"
...>
WebView Integration
JavaScript calls to navigator.credentials are delegated to the Hardware Security SDK.
This is implemented by injecting a short JavaScript file into the currently loaded page.
It intercepts API calls and delegates them to our FIDO2 implementation in Java.
The WebViewWebauthnBridge does this automatically.
Don’t forget to enable JavaScript in your WebView and delegate shouldInterceptRequest() and onPageStarted() calls to the WebViewWebauthnBridge as shown in the following:
override fun onCreate(savedInstanceState: Bundle?) {
    super.onCreate(savedInstanceState)
    setContentView(R.layout.activity_main)

    webView = view.findViewById(R.id.webview)
    webView.settings.javaScriptEnabled = true

    val webViewWebauthnBridge = WebViewWebauthnBridge
            .createInstanceForWebView(this, webView)

    webView.webViewClient = object : WebViewClient() {
        override fun shouldInterceptRequest(view: WebView?, request: WebResourceRequest?):
                WebResourceResponse? {
            webViewWebauthnBridge.delegateShouldInterceptRequest(view, request)
            return super.shouldInterceptRequest(view, request)
        }

        override fun onPageStarted(view: WebView?, url: String?, favicon: Bitmap?) {
            super.onPageStarted(view, url, favicon)
            webViewWebauthnBridge.delegateOnPageStarted(view, url, favicon)
        }
    }

    webView.loadUrl("https://webauthn.hwsecurity.dev")
}
@Override
protected void onCreate(Bundle savedInstanceState) {
    super.onCreate(savedInstanceState);
    setContentView(R.layout.activity_main);

    WebView webView = findViewById(R.id.webview);
    webView.getSettings().setJavaScriptEnabled(true);

    WebViewWebauthnBridge webViewWebauthnBridge = WebViewWebauthnBridge
            .createInstanceForWebView(this, webView);

    webView.setWebViewClient(new WebViewClient() {

        @Override
        public WebResourceResponse shouldInterceptRequest(WebView view, WebResourceRequest request) {
            webViewWebauthnBridge.delegateShouldInterceptRequest(view, request);
            return super.shouldInterceptRequest(view, request);
        }

        @Override
        public void onPageStarted(WebView view, String url, Bitmap favicon) {
            super.onPageStarted(view, url, favicon);
            webViewWebauthnBridge.delegateOnPageStarted(view, url, favicon);
        }

    });

    webView.loadUrl("https://webauthn.hwsecurity.dev");
}
Prevent Re-Creation of Activity with USB Security Keys
Besides the functionalities used by our SDK, some Security Keys register themselves as USB keyboards to be able to insert One Time Passwords (OTP) when touching the golden disc. Thus, when inserting a Security Key into the USB port, Android recognizes a new keyboard and re-creates the current activity.
To prevent this, add keyboard|keyboardHidden to the activity’s configChanges in your AndroidManifest.xml:
<activity
    android:name=".MyCustomActivity"
    android:configChanges="keyboard|keyboardHidden"
... >
Options
We provide a set of options with WebauthnDialogOptions.Builder() that can modify the user interface.
The options are documented in our API reference for WebauthnDialogOptions.
val webauthnOptionsBuilder = WebauthnDialogOptions.builder()
webauthnOptionsBuilder.setTheme(R.style.MyDialog)
webauthnOptionsBuilder.setAllowKeyboard(true)
webauthnOptionsBuilder.setFormFactor(WebauthnDialogOptions.FormFactor.SMART_CARD)
val webViewWebauthnBridge = WebViewWebauthnBridge
        .createInstanceForWebView(this, webView, webauthnOptionsBuilder)
WebauthnDialogOptions.Builder webauthnOptionsBuilder = WebauthnDialogOptions.builder();
webauthnOptionsBuilder.setTheme(R.style.MyDialog);
webauthnOptionsBuilder.setAllowKeyboard(true);
webauthnOptionsBuilder.setFormFactor(WebauthnDialogOptions.FormFactor.SMART_CARD);

// instantiate the bridge using the options
WebViewWebauthnBridge webViewWebauthnBridge = WebViewWebauthnBridge
        .createInstanceForWebView(this, webView, webauthnOptionsBuilder);
A theme allows to modify the colors in the dialog.
Add your own definition of the dialog theme to your styles.xml and adapt the colors:
<style name="MyDialog" parent="HwSecurity.Dialog">
    <item name="hwSecurityButtonColor">#000</item>
    <item name="hwSecuritySurfaceColor">#000</item>
</style>
Addendum: FIDO U2F
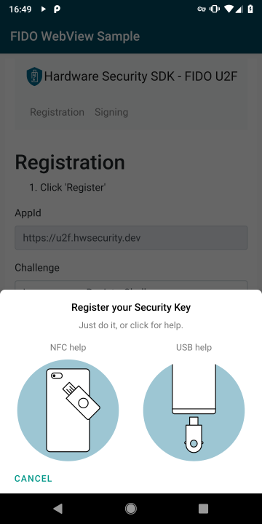
This guide assumes that your webservice implements the W3C WebAuthn specification. If you are using the legacy FIDO U2F JavaScript API, we provide a FIDO U2F WebView bridge.
Please include implementation 'de.cotech:hwsecurity-fido:4.4.0' and then use the WebViewFidoBridge class from the fido artifact (not fido2).
It works exactly like the WebViewWebauthnBridge.
Congratulations!
That’s all! If you have any questions, don’t hesitate to contact us: